Friday, 26 December 2014

How to cover up blackheads with makeup


How to Cover up Blackheads with Makeup 150x150 How to Cover up Blackheads with Makeup
Makeup can work wonders for just about any skin issue you’re dealing with. Whether your face is a little red or you have blackheads that won’t go away, makeup can help.
In order to make sure you effectively cover up those blackheads, you just have to make sure you use the right kind!
1. Start with a Primer
Face primer is absolutely essential if you want to cover up blackheads and any other skin imperfections that are bothering you. Primer can easily be applied with your fingers in a circular motion around the surface of your face. This should absorb in a few seconds and will leave your skin feeling smooth and soft. The best part about primer is that it prepares your skin for foundation so that it goes on more evenly and covers better than before.
2. Pick the right Foundation
There are a lot of different foundations you can choose from to help cover your blackheads. Liquids are generally the best because they will absorb into your skin effectively and help cover anything that you don’t want to see. Natural foundations are the best to use as are those that don’t have oil in them. Choose something that is as close to your natural skin tone as possible.
Mineral foundations are also great options because they won’t clog your pores and will absorb evenly in your skin without causing any irritation. The type of foundation that you choose will depend on whether your skin is dry, oily or combination as well as what you prefer.
3. Use Concealer
If you still find that you can see the blackheads through the foundation you already applied, then it’s time to apply concealer. This should be the same color as the foundation so that it’s not obvious you are wearing it. When you dab the foundation onto your blackheads you will need to gently blend it in with a brush. Be as gentle as you can when you are blending to avoid putting too much concealer in one area than the other.
4. Use Bronzer to Contour
Bronzer is great for contouring the face and can even make you look thinner. Brush this on your cheekbones, both sides of your forehead and under your chin. The darkness of the bronzer will take attention away from the areas of your skin that have blackheads.
5. Apply Powder
Use a setting powder to finish off your makeup look. This will blend all of your makeup together and will help cover the blackheads further. This should be a light color or light shimmer that blends nicely with your skin.
Tips:
- Always wash your makeup off at night in order to avoid more blackheads appearing in the morning.
- Exfoliate two or three times per week when in the shower to remove as many blackheads as you can.
- Avoid picking at your skin so you don’t end up with scars or scabs.
If you don’t find any blackhead treatment to be efficient on your skin, you can always try to hide them with a good pore minimizer.

Thursday, 25 December 2014

Best DIY exfolators that actually work

Exfoliating is a very important part of any skin care regime. Not only does it slough away dead skin cells, but it also unclogs the oil and dirt that lives in your pores and can cause breakouts. Most store-bought exfoliants contain harsh chemicals and dozens of questionable ingredients that have unknown benefits. Instead of shelling out the money for a store-bought exfoliator, try concocting one of these four homemade exfoliators using ingredients that you probably already have in your pantry.
As with any other exfoliating treatments, these should be used two to three times a week, not every day. And keep in mind that when trying a new skin care product (or in this case, recipe), test it out before you go to bed. That way, if you have an adverse reaction, you can give your skin time to recover while you sleep.

Baking soda
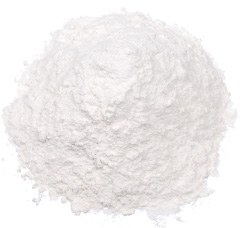
Basic baking soda scrub

The range of what baking soda can do just seems to be getting wider and wider. It can freshen the air, remove stains, clean showers and sinks, and trigger explosions in science fair volcanoes. Oh yes, we can use it to bake, too. But there is one more non-food-related use to add to baking soda’s resume: face exfoliant. The grains in baking soda are just the right size to act as a gentle exfoliant, and many claim that it has helped clear up acne. Mix in a teaspoon of baking soda to your facial cleanser to make it an exfoliating cleanser. Or make a paste of just baking soda and water, gently rub it onto your skin and leave it on for 5 to 10 minutes before rinsing off.

Sugar
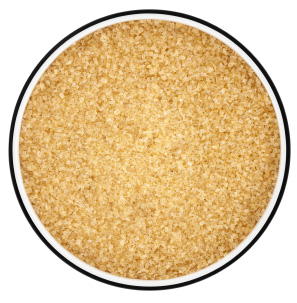
Nourishing sugar scrub

Granulated sugar is another wonderful, natural exfoliant -- and with all these reports coming out that sugar may be toxic when ingested, I’m thinking we might be better served to use it on the body versus in the body. Mix it with honey, which contains powerful antioxidant and antimicrobial properties, and a little lemon for clarifying purposes, and you have a wonderfully nourishing and effective face scrub. Combine 1 teaspoon sugar with 1/2 teaspoon honey and a squeeze of fresh lemon juice and mix well. If the mixture is a little loose, add a bit more sugar.

Coffee grounds
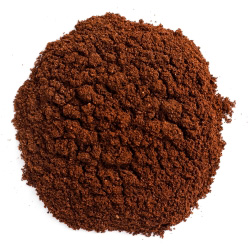
Invigorating coffee scrub

Coffee is another fantastic natural exfoliant. It contains caffeic acid, which has anti-inflammatory effects and can boost collagen production. Just as coffee stimulates our body in the morning, it can serve as a skin stimulant as well. To make the scrub, combine 1 tablespoon of ground coffee with 1 tablespoon of water or olive oil. To make this inexpensive face scrub even more economical, save the wet coffee grounds from your brewed morning coffee and use those. If you use olive oil, skip applying a moisturizer afterward, as olive oil will leave your skin super-moisturized. As a side note, since coffee grinds can clog drains, apply the scrub and buff off the grounds over a plugged sink so that you can wipe them out or use a mesh drain strainer to catch them before they go down your pipes.

Oatmeal
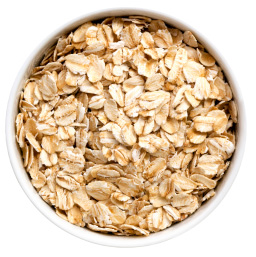
Soothing oatmeal scrub

People who use oatmeal as a natural face scrub swear by it, and now I know why. Ground oatmeal not only serves as a wonderful exfoliant, but it also absorbs and removes surface dirt and impurities while leaving your skin nourished and hydrated. It has been known to soothe and heal everything from acne to sunburn to dry, flaky skin. Given its gentle nature, it is also ideal for those with sensitive skin. Combine 1 tablespoon of ground oatmeal with 1/4 teaspoon of salt, which boosts the face treatment's exfoliating properties, and 1 teaspoon of water or olive oil to make it into a paste. Gently rub it onto you skin in circular motions, let sit for five to 10 minutes and rinse.

Tuesday, 4 November 2014

8 Steps to a flawless makeup


The first step of all: Apply a moisturizer with SPF to help concealer glide on . Then use concealer only where you need it, like on undereye circles and blemishes. Try a creamy formula in a shade that matches your skin tone. “Choosing a shade lighter is a myth,” Apply in little stripes with a pointed concealer brush. Then blend using your ring finger for the lightest touch, and don’t tug on delicate undereye areas.

To get perfectly even skin the speedy way, use a foundation stick. It’s easy and gives you plenty precise application. Using the stick like a giant marker, draw thick lines down cheekbones, the sides of your nose and above brows, and blend with your fingers. Want to look a little more sun-kissed? Before blending, use a second stick that’s two or three shades darker in all the same places for a streak-free glow (it looks dark in the pictures, but we promise it melts right in). Mix both colors together over your face and down onto your neck using your fingers—the heat from your hands will warm up the foundation and help it glide.

If a pesky zit or mark is still poking through, go back and hide it with an extra layer of concealer. Use the same kind as in step one or try a cover-up that contains salicylic acid, which helps shrink blemishes while it camouflages. Dab it onto problem areas with a pointed brush instead of slicking it on from the tube. Right on top of the blemish, “it’s not meant to be totally blended in,” says Rizzieri, but to avoid cakeyness, use your ring finger to pat its perimeter outward until smooth.

Forget shading and sculpting cheekbones with a brush and powder, and try a cream blush instead for that glow-from-within effect. Apply to the apples of your cheeks, as seen here.Then blend the color up toward your temples with your fingers.

For pro-looking eye makeup in no time, apply a wash of sheer, shimmery cream shadow from lash lines to brow bones using your pointer finger. If your skin is fair like our model’s, try a silvery white shade. For medium to dark skin tones, opt for a champagne color instead. To get an extra bright-eyed effect, dot the color onto the inner corners of your eyes too. Celebs use this trick on the red carpet all the time.

Next, use bronze and gold cream shadows to give eyes more depth. Apply the bronze shade in your creases with a flat shadow brush for more control, and use your fingers to smudge it down over the lids—avoiding the brow bones. There shouldn’t be any harsh lines or stripes of color, it should look blended and effortless. To make everything budge-proof (important with creamy formulas like these), set the cream with a matching powder eyeshadow, or dust a colorless translucent powder on top. Then, to make eyes look even bigger, pat some gold cream shadow onto the centers of your lids and run a little along your lower lash lines with your finger or a small brush.

For more intensity, rim your upper lash lines with a brown liner pencil and smudge it upward with your shadow brush. Then set with the same powder eyeshadow used in the previous step. Finish off with two coats of mascara, on top and bottom—focusing on the outer lashes with the top of the wand. If your brows aren’t as full as our model’s, lightly fill in any gaps with a pencil and use a disposable mascara wand to brush the hairs up.
If your lips are dry or at all chapped, gently buff with a damp washcloth and apply lip balm. Let it sink in well, and blot with a tissue if it feels slippery. Using a strawberry-color lipstick, apply it to the center of your mouth (make a kissy face!), where color tends to wear off first. Blend the lipstick out over your lips, patting the color on with your fingertip to help it last. This gives you that fresh, just-ate-a-popsicle look.

Friday, 10 October 2014

CONCEALER!!! Types, uses and how to apply.

Concealer is the one staple in a woman's beauty arsenal that can dramatically change your appearance. Used correctly, concealer can brighten a tired face, it can cover up blemishes and it can totally conceal under-eye circles. Many people are afraid of concealers because they don't know how to find the right shade or apply it properly. It can be daunting, but once you know the basics and try the application process below, you'll find out that concealer are the beauty product ever produced. A basic rule of choosing a concealer is that it should be a shade or 2 lighter than your skin tone. 


TYPES OF CONCEALER
Most women use concealer to lighten the areas under the eyes. Others use concealer to cover up pimples, acne scars, tattoos and even spider veins. Concealers are not a one-size fits all formula. Different concealers work on different problem areas. Here's a rundown:
• Under-eye concealer is best for camouflaging the circles under the eyes. This concealer won't work on redness or blemishes. 
• Correctors work to cover up extremely dark under-eye circles. Peach tones and pink tones work best to counteract the dark colors.
• Yellow-toned concealer that matches your skin tone exactly is best for covering up blemishes, tattoos, etc.
• Body concealer is great for covering up veins on the legs. 
• Heavy duty concealer works to cover up tattoos and bad scars. 

HOW TO APPLY CONCEALER
Concealer looks most natural when you work in "sheer layers and build it up gradually. To properly apply concealer, follow these directions:
1. Apply several dots of concealer under the eyes close to the lashes. Apply a dot to the inside corners of the eyes. You can use your finger or, for best results, try a small-headed brush with firm bristles.
2. Using the pad of your middle finger, tap in the concealer (always tap, never rub). Make sure to blend well. You can also use your index finger. There's no real rule to it, but I find the middle finger tends to be gentle.
3. Apply concealer on other uneven spots on the face -- including the chin, and around the nose and mouth if need be and tap in.
4. Apply another layer if you need more coverage.
5. Dust fine, loose powder over your face to set your concealer. According to makeup artist Scott Barnes in Allure Magazine, loose powder applied with a fluffy brush is "the secret to good concealer."

How to Disguise Dark Under-eye Circles
It's best not to use your basic concealer to try to disguise dark under-eye circles. Instead, choose an "under-eye concealer" specially formulated to cover up dark spots. These work by brightening the dark areas under the eyes and are not to be used to camouflage redness or blemishes.
How to Cover Up a Pimple
Use a stiff brush with a pointy, fine tip to dab on a concealer that matches your skin tone. It's important to apply only to the red areas, not necessarily to the raised area. Let the concealer dry. Apply a second layer. Set the concealer with a dusting of translucent powder. If you find you overdid the concealer, use a tissue to gently buff the concealer away. If that doesn't work, moisten a Q-tip with makeup remover and gently apply to the pimple. Then re-cover the pimple with concealer.

HOW TO DISGUISE A POCK MARK AND DEEP SCAR
You can disguise a concave pockmark or scar by using an angled brush dipped in a concealer that's a shade lighter than your skin tone. Fill in the center of the pockmark without going over the edges and then dust skin with translucent powder. If the scar is raised, use a concealer that matches your skin tone and pat the scar with the concealer, setting the concealer with powder.

Friday, 3 October 2014

5 steps to a clear skin

Every flawless makup starts with a beautiful and clear skin. Just like every other thing, you need to take care of your skin to make it beautiful. In this post, am going to show you 5 steps to having a clear skin. This is an every day routine that needs to be religiously followed to get the desired result.
STEP1
Run a wash cloth under hot water and immediately press it onto your face. The water and steam will really help clean the dirt from your pores. This also opens your pores, making it easier to clean them. Be careful that the water is not too hot when doing this.
STEP2
Wash your hands well with an antibacterial soap. You can't wash your face effectively with dirty hands. If you have a cleanser, wash your face after you remove the cloth. This time, apply the cleanser without wetting your face first. Make a tiny "puddle" in your hands, squirt the cleanser in the puddle, put your hands together and wash your face. Rinse with warm water.
STEP3
Get 2 tablespoons of sugar and 2 tablespoons of water. Stir so it's like a thin paste, and add one more tablespoon of sugar. Stir again and drain out some of the water. get ur hands wet rub them on your face so you have a little bit of water on your face.scoop up the sugar and water and put it on one of your cheeks. Scoop again and put it on the same cheek. Then rub in a circular way an rinse
g
STEP4
Get about ten drops of lemon juice on your hands after you wash your face. Smear on your face for ten seconds, but be careful. Lemon juice is strong and if it burns only keep it on for three seconds. It breaks down the dirt in your pores that the cleanser missed. This is your "toner".
STEP5
Splash cold water on your face or rub an ice cube on your face. because if you weren't following the directions earlier and splashed cold water on your face, your pores will have closed. The water is like a key to your pores; hot water unlocks, cold water locks. Doing all of these steps with open pores will get almost all of the dirt and bacteria out, thus keeping your skin clear. 

Thursday, 18 September 2014

Tips on how to create the "No Makeup" Makeup Look


Wearing less make up can bring out your natural beauty while still giving you a bit of enhancement. There are many advantages to limiting your make up regimen, including less money spent on cosmetics, healthier skin, more confidence, and less time spent on make up in the morning. Despite this, wearing little or no make up can be daunting, especially if u have bad skin, unshaped eyebrows or broken/dried lips. Today am going to show you how to successfully pull off the no make-up look while having a beautiful glowing skin.
1. Clear, healthy skin will give you more confidence, as well as removing the need for foundation or concealer.
* Determine your skin type. You must do this before taking action to improving your skin so that you can choose the appropriate products, and so that you know what problems you have to tackle, and how to treat them.
* Develop a good skin care routine which is suitable for your type of skin. It's important to stick to a routine as strictly as you can, this is because it can take a while for the routine to start improving the appearance of your skin, and can sometimes take time for your skin to adjust to the new things you are doing to it.
* Generally you should include: a gentle day to day cleanser, a twice weekly exfoliating facial scrub, an appropriate daily moisturizer, treatment for when spots pop up, and a face mask to use once a week/whenever needed.
* Don't be too harsh on your skin. Try to avoid strong products, and choose natural or sensitive products instead to prevent your skin from becoming irritated or dry. You could even try out DIY methods by making your own face masks to avoid harmful chemicals. If you have any specific problems, such as acne or scars, then it's recommended that you approach a specialist such as a dermatologist or your doctor to help you to develop a treatment that is right for you.

2. Take care of your lips. A soft, plump pout looks nice and kissable, but dry chapped lips can look scruffy and unhealthy. Moisturize your lips with some balm before bed, (stay away from very cheap brands as they can cause your lips to become even more dry in the long term), and exfoliate your lips every now and again to keep them smooth, (don't bother spending money on special products, sugar works fine). Also, avoid smoking, and drink plenty of water to keep your pout looking good.
3. Shape your eyebrows. A good set of brows can frame and flatter your face. Plucking is the easiest and cheapest way to shape them, just be careful to stand back from the mirror every now and again to make sure that they're even and that you're not over-plucking. If you're not brave enough to do them yourself, eyebrow shaping is widely available and fairly affordable, you could get them professionally plucked, waxed or threaded. This is definitely one of the most important steps to natural beauty as it helps to give your face more definition.

THE "NO-MAKEUP" MAKEUP LOOK

Moisturize your face. Using a small dab the size of a pea, gently rub in an unscented, oil free lotion. For a more natural look, instead of using foundation, use a tinted moisturizer. Tinted moisturizers blend in while evening out your skin tone and commonly contain SPF. Those lucky girls with clearer skin will look best using tinted moisturizer.

Apply concealer to any blemishes and around your eyes. Applying your concealer before foundation helps keep foundation to a minimal amount. Make sure this is the exact same color as your skin. When you apply the concealer, do so directly on the spot and not around it. This is to avoid a halo effect and emphasis of the spot. Set with beige powder. Be careful not to overdo it on the concealer; you only need enough to cover the spot.

Take your finger or a sponge dab in the foundation, and dab it on your face, blending it until it looks like your skin tone. Be sure to go underneath your jaw line; if you stop at the edge of your face, there will be a clear line where the foundation ends, making it look like you’re wearing a mask. If you have bags or discoloration under your eyes, make 3 dots on the line of the circles under your eyes. Blend it gently using your ring finger.

Apply Bronzer or blush(never apply both for a natural look). Some people wait until after they have applied makeup to their eyes to add bronzer or blush. Bronzer is a great way to give yourself a natural glow. Lightly brush bronzer all over your face (or just along your cheekbones and T-Zone for a natural suntan appearance). However, bronzer can look silly on people with pale skin if applied incorrectly. If you were not happy with bronzer, you can apply blush instead. Creme blush generally works better than powder because it gives you a dewy look and lasts longer.

Apply a sheer nude lip color. Avoid using chalky lipsticks or shiny lip glosses. Lip stain is generally best because it looks natural and lasts all day. Use a color that's close to your natural lip color.Dab a tiny amount of the shimmering blush onto the center of your lips. Test this step out at home before going out with it on--some people do not like the look of blush in the center of your lips. Do what feels (and looks) best to you!
Enjoy your dewy, fresh, radiant look.

Friday, 12 September 2014

How to clean your makeup brush

Now that you know which brushe to use for contouring and which to use for concealing, do you also know that you should be cleaning your makeup brushes? Washing your makeup brushes should be a regular part of your beauty routine. When you use your brushes, bits of makeup, oil, dirt, and even bacteria can get trapped in the bristles. So while it might seem basic, skipping this step can lead to clogged pores and breakouts. Not to mention the fact that quality makeup brushes can be expensive. So learning how to properly clean them is one of the best ways to protect your investment
Luckily, cleaning your makeup brushes is quick and easy. The first step to keeping your brushes clean is picking up a daily brush cleaner and spritzing it on your brushes after each use (I like Sephora’s Daily Brush Cleaner). Once a week, it’s time for a deep cleaning. (Note that your brushes will need a few hours to dry after a deep cleaning, so I’d recommend washing them after you’ve applied your makeup that day.)
Here’s the right way to deep clean your makeup brushes…
You will need:
• A shallow bowl
• Gentle clarifying shampoo or baby shampoo
• Your sink
• A lint free cloth
Instructions:
1. Begin by running your brushes under lukewarm water, rinsing out all of the residual makeup. Try to focus on the actual bristles while avoiding the part of the brush where handle meets the head, as this can loosen the glue over time .


2. Fill a bowl with lukewarm water and a squirt of shampoo, and gently swirl your brush tip in the water. If you need to, you can also swirl the brush in the palm of your hand to work up a lather.

3. Rinse the brush tip under running water once again. Repeat steps two and three until the water runs clear from the brush.

4. Use a cloth to wipe your brush clean, reshaping the bristles as you go.

5. Lay your brushes flat on a cloth to dry.
And there you have it! Your makeup brushes will be as clean a whistle. It’s also worth mentioning that there are specially formulated brush shampoos on the market. A gentle clarifying or baby shampoo will do the trick just fine though.

Tuesday, 9 September 2014

Makeup brushes and their uses


There are different types of make-up brushes which makes it very confusing to use. And unfortunately with make-up brushes you can’t just start with the smallest one and work your way in.  There are so many brushes and so many uses that it can be quite daunting and hard to know where to start.  But once you learn it, it’s definitely worth it, so let’s begin with a list of the most common make-up brushes and their uses. 
Foundation Brush
As the name suggests, this brush is designed for applying liquid foundation. Foundation brushes have tightly packed bristles of varying lengths to help achieve a smooth, non-streaky finish. You can apply foundation to your face and then use the brush to spread and blend or alternatively apply your foundation directly to the brush and then apply to the face, starting at the nose and working your way out. The second method uses less product and allows for a more precise application.
Powder Brush
The powder brush is one of the largest make-up brushes and has a wide variety of purposes. It is soft, full and rounded, allowing it to easily pick up powdered products. You can use it to distribute powder evenly to large areas, such as the face and neck. Simply pat the brush into your powder product, dust off any excess and apply using sweeping and circular motions. this brush can also be used to apply bronzer.
Stippling Brush
A stippling brush, also known as a duo-fibre brush or skunk brush is a multi-purpose brush that is most commonly used with liquid foundation, blush and bronzer. The black bristles are tightly packed together and usually made out of animal hair. Poking out above these are the white bristles, generally made from synthetics.The flat, circular, feathery head provides lightweight and buildable coverage that won’t remove any of the make-up you've already applied, so it’s perfect for layering.
Concealer Brush
This brush may be little, but when used correctly the impact it makes can be huge. We’re always told to pat in concealer not rub, but this can be difficult when applying with your fingers. Use this brush to gently pat on your concealer for smooth and flawless coverage. Whether it’s dark circles under your eyes, spots or discoloration, this nifty little brush will give you more control over those annoying imperfections. 
Blusher Brush
A blusher brush is used for applying your blush. The blusher brush is made with fine, gentle fibres with a soft rounded head. It’s ideal for applying powdered colour to the apples of your cheeks and blending it up along your cheekbone.
Contour Brush
The slanted bristles are intended to mimic the angle of your cheekbones, so it’s perfect for blending, highlighting and shading using a bronzer or illuminating powder. 
Eye Base Brush & Angle Eye Shadow brush
There are many different types of eye shadow brushes, but these two are the most commonly used. The eye base brush is used to apply colour to your entire eyelid. It’s wide, flat and short, with a bevelled edge to allow smooth application without pulling on the eyelid. Once a base colour has been applied, the angled eye shadow brush or contour eye shadow brush is then used for layering colour and creating hard lines along the eyelid crease. 
Smudger Brush
Sometimes found on the other end of an eye pencil, a smudger brush is ideal for softening hard lines and creating a smoldering look. The dome shaped bristles are shaped to fit perfectly into the crease of the eye and is a must-have for creating smokey eyes.
Lip Brush
A lip brush is a great way to achieve a perfect line when you don’t have a lip liner handy (or can’t find the right colour). The sculpted tip of the lip brush allows for precise application and lining of the lip, while the short and firm bristles gives flawless overall coverage. It’s also a more hygienic way to apply lipstick if you tend to share with housemates, friends or sisters.
Recommended brushes:
1. Lancome Foundation Brush
2. Natio Powder Brush
3. ARTISTE Stippling Brush #17
4. Bobbi Brown Concealer Brush
5. The Body Shop Blusher Brush
6. MAC Large Angled Contour Brush 168
7. GLO MINERALS Eye Base Brush
8. Natio Angle Eye Shadow Brush
9. ARTISTE Rounded Smudge Brush #29
10. Avon Retractable Lip Brush
Do you use make-up brushes to apply your make-up? What is your hero brush?

Sunday, 31 August 2014

FIVE DIFFERENT WAYS TO CREAT OMBRE LIPS

Post by Delia beautifyandclearify

Salut! Today I want to show you 5 different ways to create ombre lips. The word "ombre" is a French word, which means "to shade". Nowadays "ombre" is widely used term in beauty and fashion world: ombre hair, ombre lips, ombre clothes, ombre decor, etc.  
In this blog post I want to show you how you can create your own ombre styled lips using different techniques and tools. Let's get started!

#1. Ombre lips using lipliner or eyeliner pencil. Use lighter color as a base color and apply it all over your lips. Then using darker colored pencil create ombre effect by outlining lips or darkening inner center of your lips, whichever you prefer. I applied white eyeliner pencil as a base color, and using my brown-ish lipliner I outlined the shape of my lips. Then, took the white liner again and blended the colors until there were no edges, but smooth transition between the colors. When creating ombre effect remember to blend the colors using lighter shaded pencil. For a glossy finish, apply a lipgloss carefully, so that the colors won't mix together, losing the ombre effect.

#2. Ombre lips using lipsticks. Just like it was described in point #1, apply lighter lipstick as a base color all over your lips and create ombre effect with the darker shade using lip brush. If you are not comfortable using a brush or don't have one, fingers work just as well as any lip brush. Blend the colors smoothly, and that's it! Apply gloss if you want a glossy finish. 

#3. Ombre lips using lipstick and a lipliner/eyeliner pencil. This is my favorite way to create ombre lips, and i think it is one of the easiest ways as well. Apply lipstick all over your lips, create an ombre effect using darker or lighter shaded lipliner/eyeliner pencil. You can use either lip brush or your fingers to blend the edges of the colors together. Apply lip gloss for a glossy finish. I've created this ombre look by applying liner on the corners of my lips. 

#4. Ombre lips using lipstick and eyeshadow. Apply lipstick of your choice all over your lips. Take a little bit of the eyeshadow on your brush or a finger tip and carefully apply it on the center of your lips by gradually blending the edges. I would recommend you to pick lipstick color which has a higher contrast with an eyeshadow color, since ombre effect is less visible when the base color is light (as you can see in the pictures). 

#5. Ombre lips using eyeshadows. On my previous post I posted a picture of purple ombre lips, which were created using eyeshadows-on-lips ombre technique. You can play around with different colors and create various looks using this method. Let's do rainbow lips! First, apply concealer all over your lips and apply lip primer or an eyeshadow primer. Now start packing the rainbow colors one after another. Once finished, clean up the outer edges of the lips using concealer. Apply gloss for a glossy finish. Enjoy!

Hope you find this blog post useful. Have fun creating lovely ombre lips!

Sunday, 24 August 2014

BLACKHEADS....Home remedies that actually work.


The key to getting rid of your blackheads is unplugging the pores and dislodging the buildup. While it might be tempting squeeze it out, it's not something I recommend. Your fingers have oils and dirt on them which could cause further breakouts. lets's face it: blackheads can be difficult to cover up. The mixture of oil and sebum that hits the skin's surface creates large black dots that darken your skin, enlarge your pores and look unsightly. There are over the counter products that works well for blackheads but before you buy any product, look at the product pack for the following ingredients...
Look for cleansers, exfoliators and acne products that contain salicylic acid, glycolic acid or benzoyl peroxide - or a combination of those. Products that include these ingredients loosen the dead skin cells that can get clogged in your hair follicles. These ingredients can literally help unplug the follicles. These chemical exfoliators are different than the grainy exfoliators. They work evenly and effectively without causing your face any irritation.
Instead of dropping cash at the drugstore, you can quickly banish blackheads and shrink pores with home remedies that work to naturally cleanse, tone and balance the skin. Much gentler than prescription medication, natural blackhead remedies will have you saying bye to blackheads and hello to beautiful skin.
WORK A HOMEMADE WASH
It's crucial to stick to a cleansing routine twice a day when trying to eliminate acne-causing bacteria from your face. Help combat blackheads with a homemade wash consisting of 1/2 cup of rolled oats, 1/4 cup of water, 1/2 tablespoon of honey and 1/4 cup of lemon juice mixed in a bowl. Scoop a dollop onto your fingertips and gently massage onto your face, in small circles, for at least 30 seconds. Rinse with warm water and pat dry with a clean towel. The oats exfoliate the skin and absorb excess oil; lemon kills bacteria, while the honey adds necessary moisture back into the skin.
SCRUB FOR SUCCESS
Two or three times a week, use a natural abrasive scrub that exfoliates dead skin cells, brightens your complexion and evens out the skin's surface. Mix together 3 tablespoons of fresh cream, 1 cup of white sugar, 1/2 cup of brown sugar, 1/2 cup of ground almonds and 2 tablespoons of olive oil. Massage over your entire face in a circular motion for 1 minute. First rinse with warm water, followed by a splash of cold water all over your face. Pat dry with a clean, soft towel. Cover any extra scrub with plastic wrap and place in the refrigerator for the next use.
MAKE A MASK
Apply a homemade mask to your face twice a week. Mix together 1 part almond powder and 2 parts rose water for a smooth paste. The almond helps exfoliate the skin, while the rose water acts as a mild antiseptic. Smooth the mask on your face using your fingertips, being careful to place a generous amount on the problem areas. Leave on your face for 15 minutes and then rinse thoroughly with cool water. Place any remaining mask in the refrigerator for the next use.
Try these products for one month and you will be surprised at how beautiful and glowing your skin will look.

Wednesday, 20 August 2014

Tricks on how to fix a broken pressed powder and lipstick

I was walking past a beauty shop one afternoon when i decided to window shop and while i was looking around i saw it... Jordana pressed powder and my favourite Marykay lipstick. They looked so pretty and the powder shade is my exact skin color. Feeling very excited i immediately i purchased both items and couldnt wait to try them out the next morning. i got home really tired and slept off almost immediately. The next day i had my bath and wanted to start my makeup routine.I picked up my powder and lip stick and there is was, the heart break of all time, my powder and lip stick were broken!!! My baby brother had used them as his toy while i was sleeping. However my saving grace was that i learnt a trick long ago on how to fix broken powder and lipstick which am going to show u today.
 
HOW TO FIX A BROKEN POWDER
If your pressed powder breaks, dont throw it away. Simply follow the steps below...
* Wrap it up in a transparent nylon.
* Mash it up till it becomes loosed.
* Remove nylon and add alchol
* Smooth it over.
* Perfect the edges and allow to dry...
There you have your favourite powder again, clean and fresh as though it never happened.
 
HOW TO FIX YOUR BROKEN LIPSTICK
If your lipstick breaks off, simply take off the broken portion with a tissue, then slowly wave a lit match under the broken piece of lipstick. When it's melted a bit, put it back on the base, swivel it down and put it in the fridge -- uncovered -- for 30 minutes
Try this steps on your own and comment on the results you get....

Thursday, 14 August 2014

Luminizer - Highlighter!!!! The secret to a raidant makeup finish...

Ever wonder how celebrities get such glowing, ethereal skin? It’s not all fancy facials and expensive aesthetician visits. With the right highlighter and proper know-how, you can fake it!
 Highlighter, which is also known as luminizer comes in many forms, from cream to liquid to powder. While you use darker colors for contouring, highlighting brings your features forward and makes skin look younger and more dewy. Because you can find it in so many different shades and finishes, deciding which highlighter is right for you can be daunting. In this post i will show you how to choose a highlighter and how to achieve that glowing skin.
Choosing a shade
When it comes to highlighter, one size doesn’t fit all. To select the right shade for yourself, keep your undertones in mind. When I’m working with a darker skin tone, I tend to go with more of a gold-based shimmer that’s on the warmer side. For lighter skin, i use a silvery or champagne colored tone. MAC Strobe Cream works for a wide range of skin tones, because it’s a mica pearl pigment that’s multi-colored. Sometimes I use a shimmering Eyeshadows from a line with a wide range of colors. It works great for those seeking a custom shade to use as a highlighter.
For an everyday, natural application
Some pople tend to overdo highlighting, and it can end up looking silly. The whole point of highlighter is to look like you’re naturally glowing and have a perfect complexion. The question now is how should we wear it? Its simple... simply wear a tinted moisturizer and a little bit of the luminizer in it to get the glow. It looks beautiful especially if you want people to think you have beautiful skin.
Red - carpet - ready technique-
When am doing a client for the red carpet, i avoid highlighting all over, because that tends to look really shiny in photographs. If you're going to be photographed, Julianne suggests placing luminizer anywhere that protrudes: the high planes of the cheeks, down the bridge of the nose, and the cupid’s bow to give the illusion of a fuller lip. Another great trick is to apply a stick highlighter over foundation, and then go over it with a powder highlighter. “You’ll have that lit-from-within beautiful glow!.
Highlighter is a must have for an everyday look cos it gives that radiance and glow. Try this beauty trick and lets hear your feedback. 

Tuesday, 12 August 2014

Facial Oil!!!- Your secret to a beautiful skin...

Have you tried every skin product you can find- from moisturizers to facial scrubs to facial cleansers- just because you want to have a glowing skin? Some people even spend extra time and money at beauty spa for facial wash and treatment. Worry no more cos i have a secret that might just be the answer to your facial problem. FACIAL OIL!!!
Yes, Facial oils are essential oils from natural sources, and they’re becoming more and more popular as experts and consumers see what they can do for skin (hydrate, reduce inflammation, etc.). When we think of oil, it brings back memories of mineral oil, used in the past industrially. Today’s oils are quite different, and are pure and cosmetic-grade. Using facial oil is simple. All you do is wash your face, dry it, drip a few drops of oil onto your hands, and then spread it gently and evenly over your face once in d morning and once before bed. Not too much—a little goes a long way. It’s better to use oils prepared especially for the skin. But if you can’t find (or afford) those? “Extra-virgin organic coconut oil works just fine. 
OILS BY SKIN TYPE
The great thing about oils is that, apparently, everyone can use them. Dry, sensitive skin? You can use oil! Oily, acne-prone skin? You can use oil! (Unless you have an allergy or sensitivity to a particular oil, of course.)
OILY, ACNE-PRONE, OR COMBINATION SKIN TYPE
Believe it or not, oil-based cleansers are ideal for oily skin. “Oil attracts oil and is able to penetrate deep into the pores for cleansing. So oily and combination skin benefit from oil washes. And as it turns out, you can used an oil-based cleanser or a straight-up facial oil to wash your face. Dampen skin, and then take a small amount of the cleanser or oil and massage it into your face for about a minute; then remove with a warm washcloth. If your face and hairline are getting greasy by midday after switching to facial oil, use less oil, or switch to a facial oil specifically designed for oily skin.
NORMAL OR DRY SKIN
Use facial oil as a moisturizer. Olive oil and coconut oil are great for dry skin. Personally, I am a fan of coconut oil.

 INCORPORATING OILS INTO YOUR ROUTINE
The question on our lips now would be, "should we throw out our beloved facial cleansers, creams, and moisturizers in favor of oil? Nope! I think oils and moisturizers work well together. “There are water-soluble ingredients delivered by moisturizers that aren’t in oils.” So, if your skin is flaking and on the dry side, your skin probably needs the emolliency of an oil.
Armed with this knowledge, you are one step to solving that skin problem that seem very disturbing.

Sunday, 10 August 2014

Sanitizing your eye liner sharpener


I clean my brushes regularly, toss out old and expired makeup, and even wipe down my eyelash curler—but i completely forget about my eyeliner sharpener and it has been that way for as long as I can remember. One day it just occurred to me that this often used beauty tool also needs some regular cleaning and sanitizing too.

One that note i did some research on how to sanitize the sharpener. Rebecca Restrepo, the global makeup artist for Elizabeth Arden, gave us the low-down on sharpener upkeep. For your personal use sharpener, she recommends the following routine.

Weekly
Empty the shavings and lead from the sharpener’s inner compartment. Dip a cotton swab in isopropyl alcohol (aka rubbing alcohol) and work your way around the inside of the compartment as well as the blade. The alcohol acts as a disinfectant.

Monthly or every few weeks
Sanitize the sharpener by wiping it down thoroughly with a Beauty cosmetic sanitizer wipe. These wipes are designed and formulated to eradicate potentially harmful bacteria, including e.coli and staphylococcus.

Replace your sharpener...Restrepo says the shelf life of a makeup sharpener is relatively long. For a personal use, it fan last for about a year. “If it’s kept clean, it should be fine, even if it accumulated a lot of shavings,” she says. But if you contract an eye infection or break out near your lips, she recommends immediately tossing the sharpener—along with any makeup that may be contaminated.