Saturday, 5 September 2015

Zaron Perfect Finish Spray Review


I have been using the Zaron perfect finish mist for over 2months now and am loving every bit of it so I decided it's time to do a review.  
The Zaron perfect finish mist comes in a black pack (typical with every zaron product). The main product is in a silvery-white bottle-like container with a black pump. The Zaron perfect finish has a transparent liquid consistency (like water) and it smells great. It is lightweight and suitable for all skin types. 
It is a fixing spray that moisturizes and refreshes the skin. As the name implies "perfect finish", it's used mainly to set your makeup to perfection after you have applied every other makeup and give you that longevity for the much needed all day wear.
This product is a. go-to-friend for ladies in African because of the humid climate. It ensures your makeup stays perfect through heat, humidity and other weather conditions.

Directions to apply:
*  Spray should be applied over foundation or finished makeup.
*  Spray lightly 12-16 inches away from the face with eyes closed.
*  Allow to dry.
*  Can be worn before or after makeup.

This product retails for N3,000.

My conclusion,
The zaron perfect finish is an awesome mist that gets the job done and some more. There was this one time I had a very busy day,i was expected to sit for another meeting but you could see all over my face that I was really tired. All I did was to spray a bit of the zaron perfect finish mist over my face and I felt instantly refreshed. It's relatively cheap and I would recommend it especially if you have a dry skin. 

Pls give this product a try nd let's read your reviews. 

Thursday, 27 August 2015

ZARON FACE PRIMER REVIEW


As with every of Zaron product I have used, the Zaron Face Primer comes in a black pack, the actual primer is in a white 40ml tube with a black pump and a black transparent black pump cover.

The primer itself is a transparent gel-like formula which is basically odorless. It has a smooth vevelty feel on the skin. Zaron says it helps to reduce the appearance of pores and fine lines. I didn't know if that was true (bcos I have a smooth skin) until I tried it on a client. It really gets the job done.

Zaron says this Face Primer is a multi-purpose product that helps to increase the longevity of makeup on the face, preventing foundation from looking cakey.  I have a combination skin. The first time I used it, I applied a marykay foundation IMMEDIATELY, but after 3hours my T-zone was oily and my undereye area was already cakey. After several trials, I found out that it works better if you apply the primer and allow it to dry on your skin before you apply your foundation. Don't expect it to absorb completely because it won't instead it will have the velvet shine.

The good thing is that even if your face gets oily, all you need do is to pat the oily areas with a paper towel. No need for additional powder. Trust me, I tried it on a bride and it worked perfectly well.

This primer is relatively cheap as it cost 2,500 Naira in zaron outlets and 3,000 Naira in retail shops.

This is my final conclusion on the Zaron Face Primer. It is a very good primer for a dry or combination skin. A person with fairly oily skin can use it if only you use it with a matte foundation and a Shine Free powder. I love this foundation and I will definitely recommend it.
I will really love to read your views on this product. Leave a comment below.

Thursday, 21 May 2015

LA GIRL PRO HD CONCEALER REVIEW

Today's post is about the LA GIRL PRO HD CONCEALER. This concealer is the talk of most ladies on youtube, twitter and instagram because it comes in variety of shades and undertones for all skin types. I got 3 shades of this concealer in d color, toffee, fawn and beautiful bronze( just to be on a safe
side).

Saturday, 7 March 2015

My First Time Crocheting

MY FIRST TIME CROCHET EXPERIENCE
I love beautiful hairs. A beautiful hair with a flawless makeup is every woman’s desire. However, I’ve always had one problem with making my hair. I find it very difficult to sit for hours in a saloon. After 2 hours of being in a saloon, I start getting really uncomfortable.  That’s why I love whoever that came up with wigs… it’s so easy to wear. My only challenge with wearing wig is that, in one glance everybody automatically knows it’s a wig (I guess that how I feel). This got me busy online, searching for an alternative way to wear my hair without feeling guilty about my salon problem and after long hours of searching, I found a video on YouTube by Teeday talking about crocheting a kinky twist. The video got me inspired and I decided to try it but my only challenge was that I know nothing about braiding or twisting. Just to be on a safe side I decide to try it out with a cheap curly weave-on.
First I asked my sister to help braid my hair all back in 9 cornrows (remember I told u I know absolutely nothing about hair making). Using a needle and a thread, she sews the tail end of my hair to one of the cornrows, as you would do if you wanted to fix a weavon. On the YouTube video, Teeday used a latch hook or a crochet pin to install but since I didn’t have a crochet pin, I used a bobby pin – yes, the good old bobby pin. I took the hair and I started installing it.
It took me a total of 1 hour 40 minutes to get it all installed. And I loved the end result. It looks very natural and it didn’t take that long to install + I got to do it in the comfort of my bedroom. Every video I’ve watched about crocheting talked about how easy it was to install, nobody said it was super super easy and fun. I love my hair and I’m loving the way people admire it.

Friday, 26 December 2014

How to cover up blackheads with makeup


How to Cover up Blackheads with Makeup 150x150 How to Cover up Blackheads with Makeup
Makeup can work wonders for just about any skin issue you’re dealing with. Whether your face is a little red or you have blackheads that won’t go away, makeup can help.
In order to make sure you effectively cover up those blackheads, you just have to make sure you use the right kind!
1. Start with a Primer
Face primer is absolutely essential if you want to cover up blackheads and any other skin imperfections that are bothering you. Primer can easily be applied with your fingers in a circular motion around the surface of your face. This should absorb in a few seconds and will leave your skin feeling smooth and soft. The best part about primer is that it prepares your skin for foundation so that it goes on more evenly and covers better than before.
2. Pick the right Foundation
There are a lot of different foundations you can choose from to help cover your blackheads. Liquids are generally the best because they will absorb into your skin effectively and help cover anything that you don’t want to see. Natural foundations are the best to use as are those that don’t have oil in them. Choose something that is as close to your natural skin tone as possible.
Mineral foundations are also great options because they won’t clog your pores and will absorb evenly in your skin without causing any irritation. The type of foundation that you choose will depend on whether your skin is dry, oily or combination as well as what you prefer.
3. Use Concealer
If you still find that you can see the blackheads through the foundation you already applied, then it’s time to apply concealer. This should be the same color as the foundation so that it’s not obvious you are wearing it. When you dab the foundation onto your blackheads you will need to gently blend it in with a brush. Be as gentle as you can when you are blending to avoid putting too much concealer in one area than the other.
4. Use Bronzer to Contour
Bronzer is great for contouring the face and can even make you look thinner. Brush this on your cheekbones, both sides of your forehead and under your chin. The darkness of the bronzer will take attention away from the areas of your skin that have blackheads.
5. Apply Powder
Use a setting powder to finish off your makeup look. This will blend all of your makeup together and will help cover the blackheads further. This should be a light color or light shimmer that blends nicely with your skin.
Tips:
- Always wash your makeup off at night in order to avoid more blackheads appearing in the morning.
- Exfoliate two or three times per week when in the shower to remove as many blackheads as you can.
- Avoid picking at your skin so you don’t end up with scars or scabs.
If you don’t find any blackhead treatment to be efficient on your skin, you can always try to hide them with a good pore minimizer.

Thursday, 25 December 2014

Best DIY exfolators that actually work

Exfoliating is a very important part of any skin care regime. Not only does it slough away dead skin cells, but it also unclogs the oil and dirt that lives in your pores and can cause breakouts. Most store-bought exfoliants contain harsh chemicals and dozens of questionable ingredients that have unknown benefits. Instead of shelling out the money for a store-bought exfoliator, try concocting one of these four homemade exfoliators using ingredients that you probably already have in your pantry.
As with any other exfoliating treatments, these should be used two to three times a week, not every day. And keep in mind that when trying a new skin care product (or in this case, recipe), test it out before you go to bed. That way, if you have an adverse reaction, you can give your skin time to recover while you sleep.

Baking soda
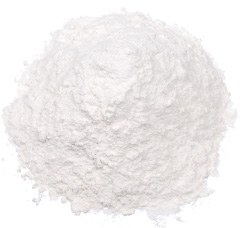
Basic baking soda scrub

The range of what baking soda can do just seems to be getting wider and wider. It can freshen the air, remove stains, clean showers and sinks, and trigger explosions in science fair volcanoes. Oh yes, we can use it to bake, too. But there is one more non-food-related use to add to baking soda’s resume: face exfoliant. The grains in baking soda are just the right size to act as a gentle exfoliant, and many claim that it has helped clear up acne. Mix in a teaspoon of baking soda to your facial cleanser to make it an exfoliating cleanser. Or make a paste of just baking soda and water, gently rub it onto your skin and leave it on for 5 to 10 minutes before rinsing off.

Sugar
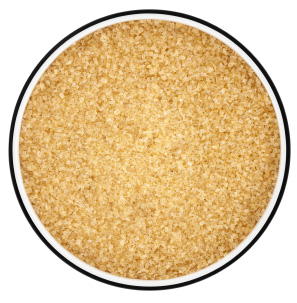
Nourishing sugar scrub

Granulated sugar is another wonderful, natural exfoliant -- and with all these reports coming out that sugar may be toxic when ingested, I’m thinking we might be better served to use it on the body versus in the body. Mix it with honey, which contains powerful antioxidant and antimicrobial properties, and a little lemon for clarifying purposes, and you have a wonderfully nourishing and effective face scrub. Combine 1 teaspoon sugar with 1/2 teaspoon honey and a squeeze of fresh lemon juice and mix well. If the mixture is a little loose, add a bit more sugar.

Coffee grounds
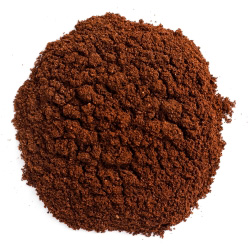
Invigorating coffee scrub

Coffee is another fantastic natural exfoliant. It contains caffeic acid, which has anti-inflammatory effects and can boost collagen production. Just as coffee stimulates our body in the morning, it can serve as a skin stimulant as well. To make the scrub, combine 1 tablespoon of ground coffee with 1 tablespoon of water or olive oil. To make this inexpensive face scrub even more economical, save the wet coffee grounds from your brewed morning coffee and use those. If you use olive oil, skip applying a moisturizer afterward, as olive oil will leave your skin super-moisturized. As a side note, since coffee grinds can clog drains, apply the scrub and buff off the grounds over a plugged sink so that you can wipe them out or use a mesh drain strainer to catch them before they go down your pipes.

Oatmeal
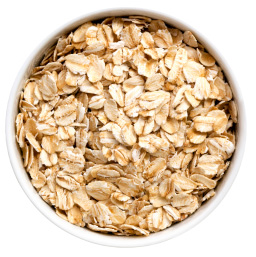
Soothing oatmeal scrub

People who use oatmeal as a natural face scrub swear by it, and now I know why. Ground oatmeal not only serves as a wonderful exfoliant, but it also absorbs and removes surface dirt and impurities while leaving your skin nourished and hydrated. It has been known to soothe and heal everything from acne to sunburn to dry, flaky skin. Given its gentle nature, it is also ideal for those with sensitive skin. Combine 1 tablespoon of ground oatmeal with 1/4 teaspoon of salt, which boosts the face treatment's exfoliating properties, and 1 teaspoon of water or olive oil to make it into a paste. Gently rub it onto you skin in circular motions, let sit for five to 10 minutes and rinse.

Tuesday, 4 November 2014

8 Steps to a flawless makeup


The first step of all: Apply a moisturizer with SPF to help concealer glide on . Then use concealer only where you need it, like on undereye circles and blemishes. Try a creamy formula in a shade that matches your skin tone. “Choosing a shade lighter is a myth,” Apply in little stripes with a pointed concealer brush. Then blend using your ring finger for the lightest touch, and don’t tug on delicate undereye areas.

To get perfectly even skin the speedy way, use a foundation stick. It’s easy and gives you plenty precise application. Using the stick like a giant marker, draw thick lines down cheekbones, the sides of your nose and above brows, and blend with your fingers. Want to look a little more sun-kissed? Before blending, use a second stick that’s two or three shades darker in all the same places for a streak-free glow (it looks dark in the pictures, but we promise it melts right in). Mix both colors together over your face and down onto your neck using your fingers—the heat from your hands will warm up the foundation and help it glide.

If a pesky zit or mark is still poking through, go back and hide it with an extra layer of concealer. Use the same kind as in step one or try a cover-up that contains salicylic acid, which helps shrink blemishes while it camouflages. Dab it onto problem areas with a pointed brush instead of slicking it on from the tube. Right on top of the blemish, “it’s not meant to be totally blended in,” says Rizzieri, but to avoid cakeyness, use your ring finger to pat its perimeter outward until smooth.

Forget shading and sculpting cheekbones with a brush and powder, and try a cream blush instead for that glow-from-within effect. Apply to the apples of your cheeks, as seen here.Then blend the color up toward your temples with your fingers.

For pro-looking eye makeup in no time, apply a wash of sheer, shimmery cream shadow from lash lines to brow bones using your pointer finger. If your skin is fair like our model’s, try a silvery white shade. For medium to dark skin tones, opt for a champagne color instead. To get an extra bright-eyed effect, dot the color onto the inner corners of your eyes too. Celebs use this trick on the red carpet all the time.

Next, use bronze and gold cream shadows to give eyes more depth. Apply the bronze shade in your creases with a flat shadow brush for more control, and use your fingers to smudge it down over the lids—avoiding the brow bones. There shouldn’t be any harsh lines or stripes of color, it should look blended and effortless. To make everything budge-proof (important with creamy formulas like these), set the cream with a matching powder eyeshadow, or dust a colorless translucent powder on top. Then, to make eyes look even bigger, pat some gold cream shadow onto the centers of your lids and run a little along your lower lash lines with your finger or a small brush.

For more intensity, rim your upper lash lines with a brown liner pencil and smudge it upward with your shadow brush. Then set with the same powder eyeshadow used in the previous step. Finish off with two coats of mascara, on top and bottom—focusing on the outer lashes with the top of the wand. If your brows aren’t as full as our model’s, lightly fill in any gaps with a pencil and use a disposable mascara wand to brush the hairs up.
If your lips are dry or at all chapped, gently buff with a damp washcloth and apply lip balm. Let it sink in well, and blot with a tissue if it feels slippery. Using a strawberry-color lipstick, apply it to the center of your mouth (make a kissy face!), where color tends to wear off first. Blend the lipstick out over your lips, patting the color on with your fingertip to help it last. This gives you that fresh, just-ate-a-popsicle look.